Embellished Storage Basket (from Target One Spot)
We may earn money or products from the companies mentioned in this post.

Hello, All Things Target readers, I’m excited for the opportunity to be able to share some craft projects with you over the next little while. I LOVE the Target dollar spot, it is one of my favorite things about Target. On my recent trip I found these fun baskets. There are so many uses for them, they will be perfect for my craft room.
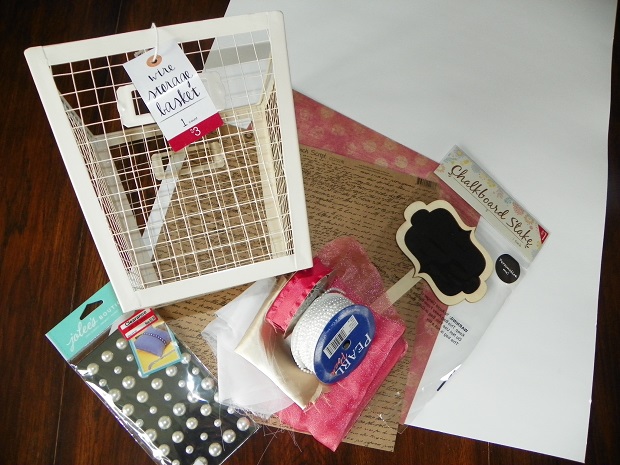
I love the baskets but they weren’t quite perfect for what I needed, yet! They needed a little sprucing up. Here is what you need:
- wire basket
- chalkboard stake
- bling/embellishments (I used pearl strands, jute, and stick on pearls)
- scraps of fabric
- scrap of felt
- scrapbook paper
- poster-board
- glue gun
- school glue stick or spray adhesive
- spray paint
Let’s get started. The first thing I needed to do was add an insert in my basket to add some color and then reduce the chance of something getting snagged, they are made of wire after-all. Yes, I am speaking from experience. Numerous scarves have been snagged on wire baskets in my closet. I’m so glad to have a cute solution now.
These baskets are just the right size for a sheet of poster board. Trace the bottom and side of the basket on scrap paper and cut out. Put them inside the basket to make sure they fit correctly, if not trim them down. This is important, if they are too big the insert will not fit properly. Once trimmed, trace the base pattern in the center of the poster-board and trace the side pattern on each of the four edges of the base square. Cut it out leaving the sides attached to the base square. Fold up the sides along the tracing line for the base.
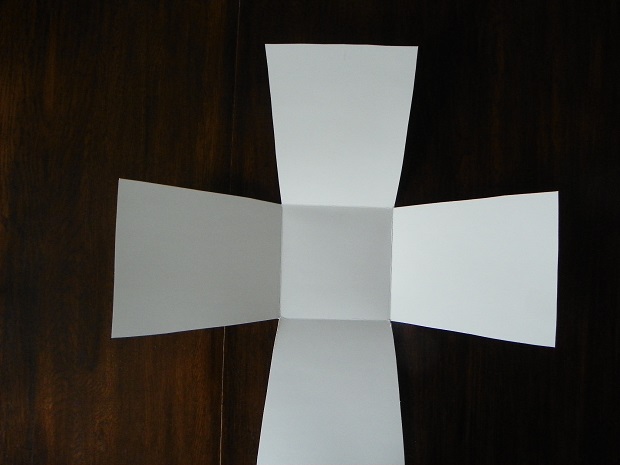
You need four sheets of scrapbook paper, one for each side of the basket insert. Using a glue stick or spray adhesive attach the scrapbook paper to the side pieces on the poster-board, the bottom is not necessary. Insert it into your basket.
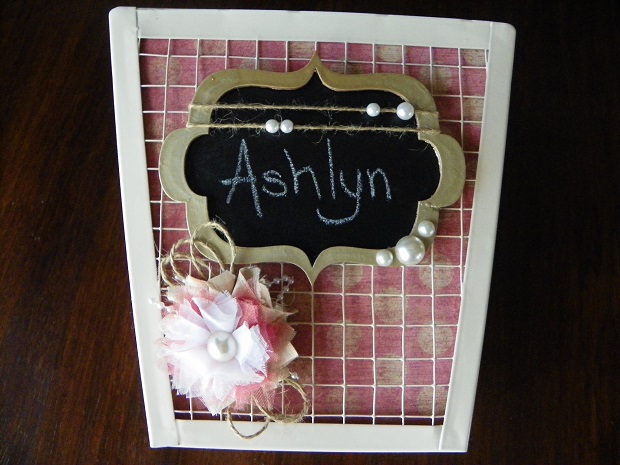
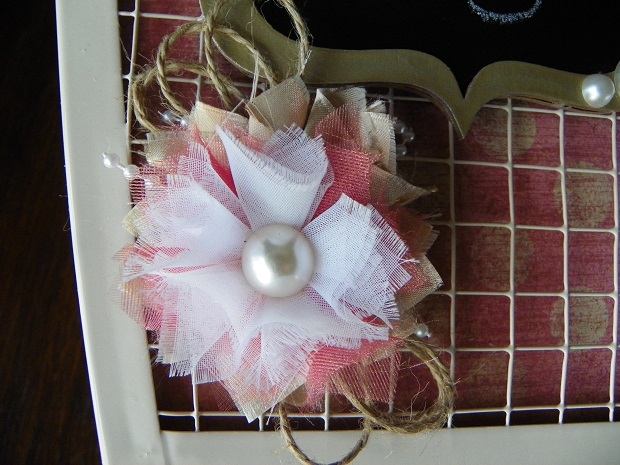
Now for the embellishments. To paint the chalkboard frame, tape off the chalkboard and spray paint the frame. Add the pearl embellishments to the corner. Even though the pearls have adhesive on the back, I did add some glue to make sure they would stay. Thread some pearls onto jute and wrap it around the chalkboard frame, glue it to the back.

For the flower; cut squares of fabric, mine were approximately 2.5″ x 2.5″ for the first layer, and .5″ smaller each layer after. Fold them in half, with the edges uneven, kind of in a triangle, then fold the outside edges to the middle. 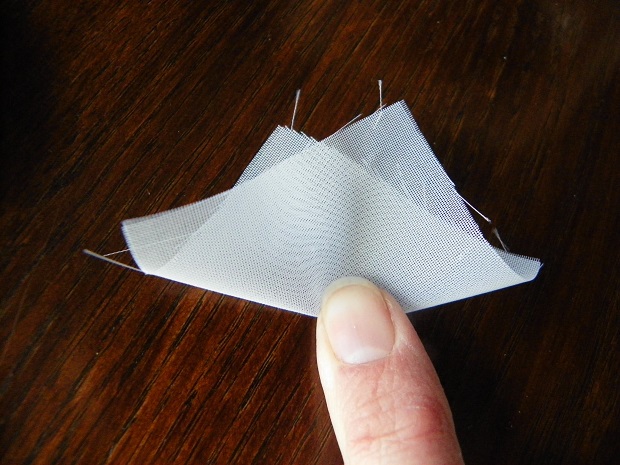 Start with the bottom layer and glue the middle of your petals onto a felt circle. Continue with the next layers gluing them in the center on top of the previous layer. I added some strips of strung pearls onto the back and also some jute loops and a pearl in the center that matched the frame.
I love how it turned out. There are some many uses for these basket, I may just use this one for Easter and then for my craft room.