Handmade Watercolor Card Tutorial
We may earn money or products from the companies mentioned in this post.
 I love it when Target refreshes their arts and crafts aisle. The latest changes added a nice variety of painting supplies. I find watercolor relaxing to work with, so I couldn’t wait to try some of the new supplies to create a watercolor card.
You’ll need:
I love it when Target refreshes their arts and crafts aisle. The latest changes added a nice variety of painting supplies. I find watercolor relaxing to work with, so I couldn’t wait to try some of the new supplies to create a watercolor card.
You’ll need:
- Brea Reese 38pc Watercolor Resist Paper Pad
- Hand Made Modern 12ct Watercolor Paints
- paintbrush
- cardstock
- paper trimmer
- scissors
- glue or tape runner
- double sided foam tape
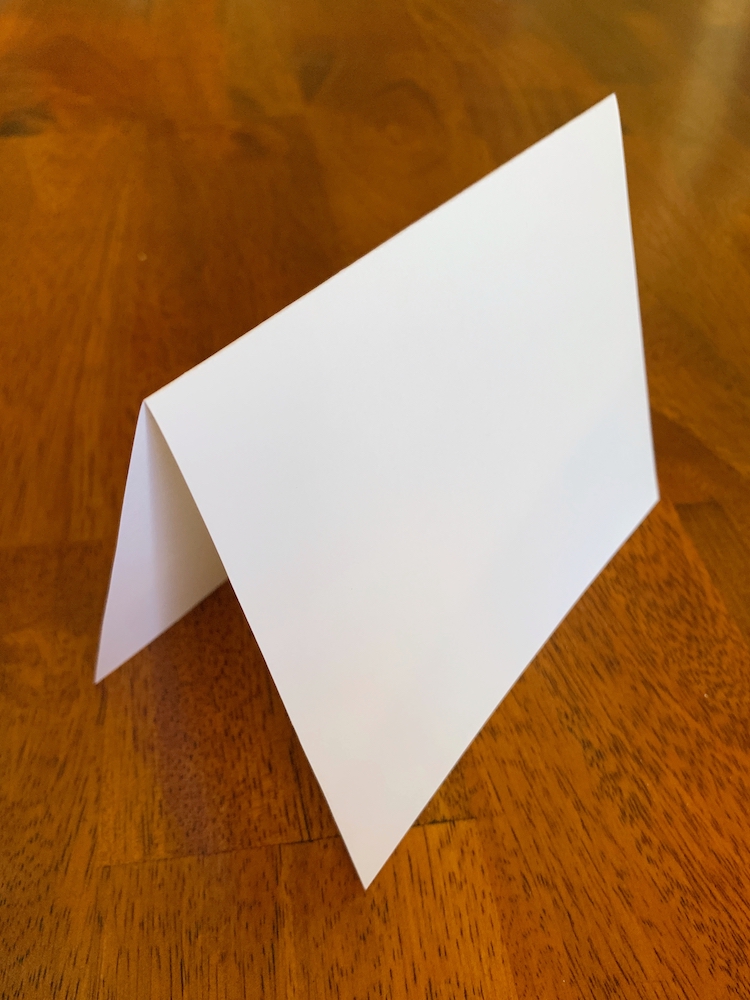
 Take a sheet of cardstock and cut it in half.
 Fold it in half to create the base of your card.
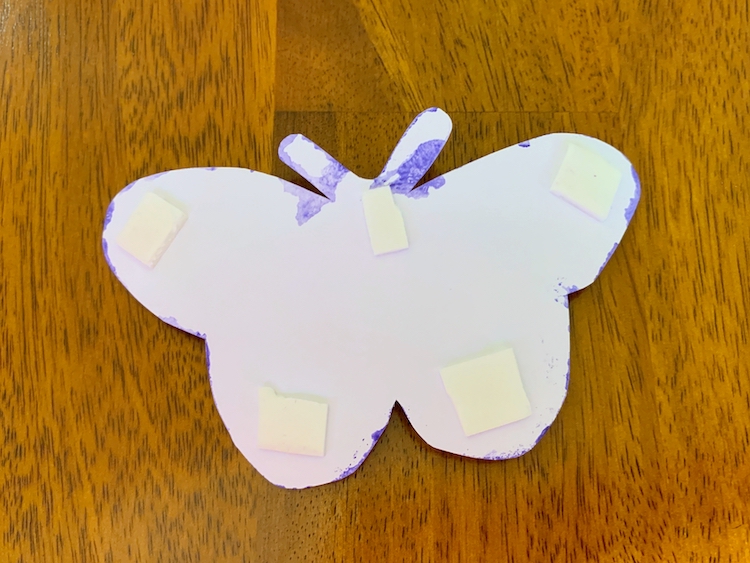
 Choose a design from the watercolor resist paper pad and cut it out.
 Paint watercolor onto the cut out design. Blot it with a paper towel to release any excess paint.
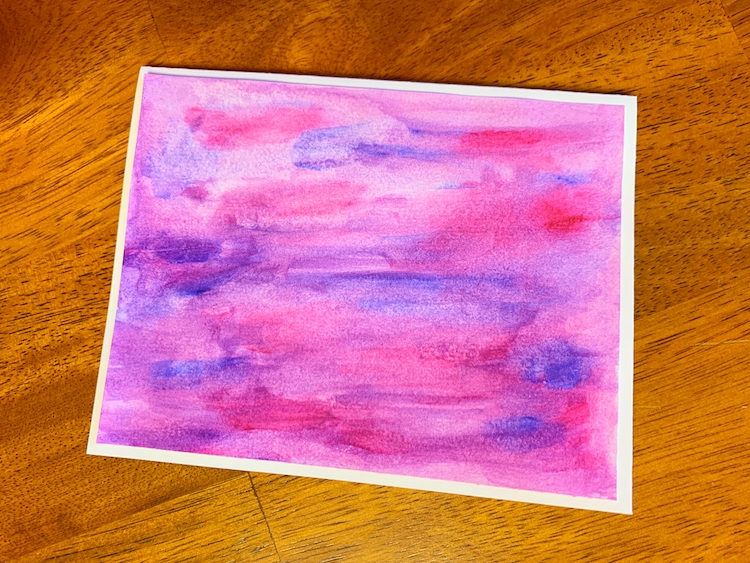
 Toward the back of the paper pad there are a few blank sheets of watercolor paper. Using that paper, cut out a rectangle slightly smaller than the front of your card. This will be the background on the front of your card so paint it as you wish.
 After everything has a chance to dry, adhere the watercolor rectangle to the front of the card with glue or a tape runner.
 Using foam tape or dots that have adhesive on both sides, attach the cut out design to the front of the card.
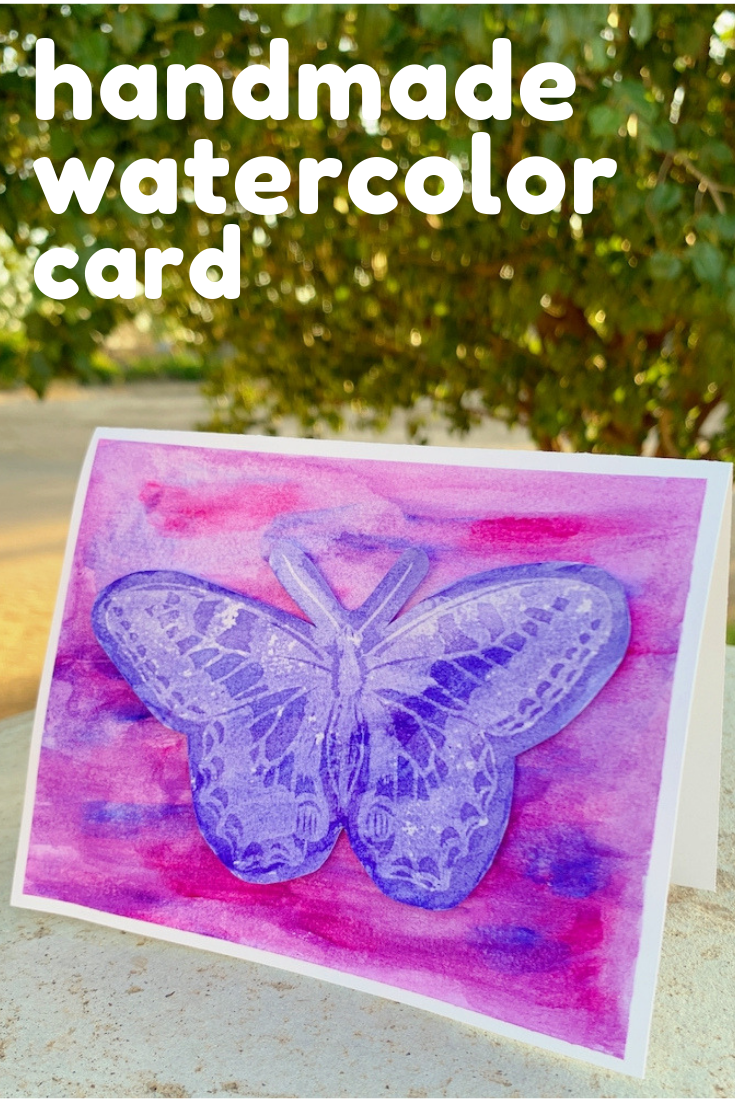
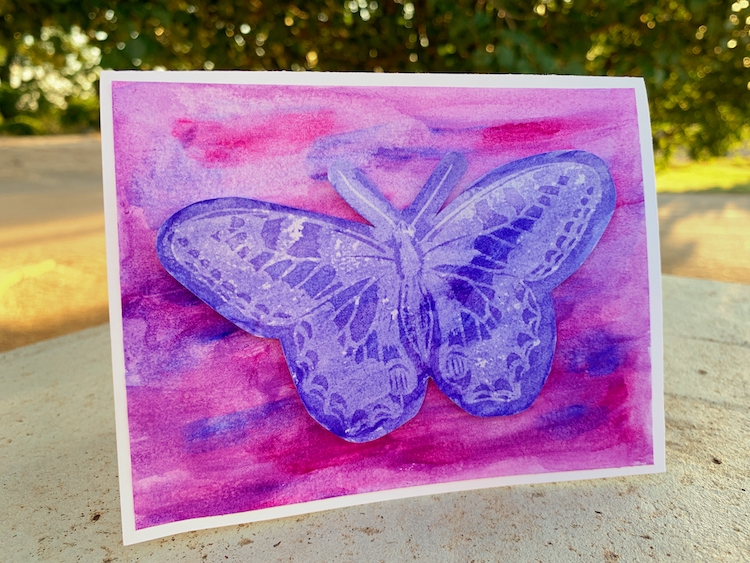
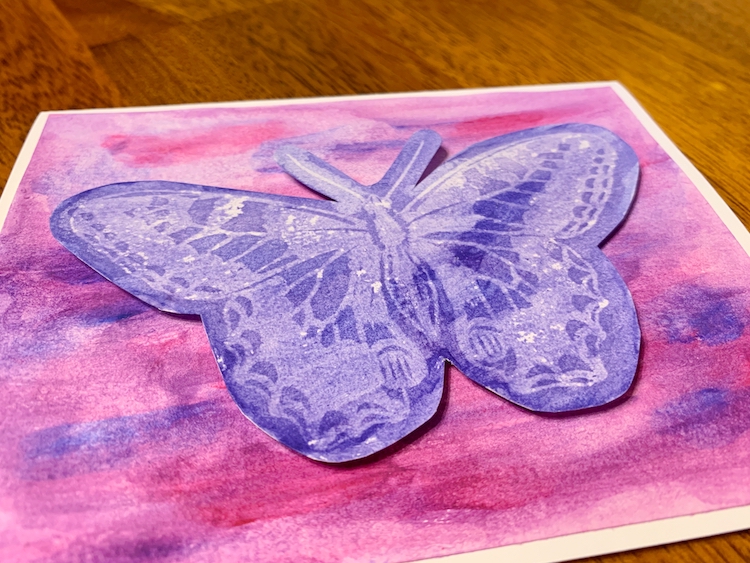 Your watercolor card is now complete! The watercolor resist paper makes it so easy to create a beautiful handmade card, no matter your skill level.
 Analisa is a mom and avid DIYer. Along with her family, she will travel anywhere just to say she’s been. She writes about creating, parenthood, and her family’s adventures at Parental Perspective. She’d love to meet you so feel free to visit her on Instagram or Facebook and say hello!